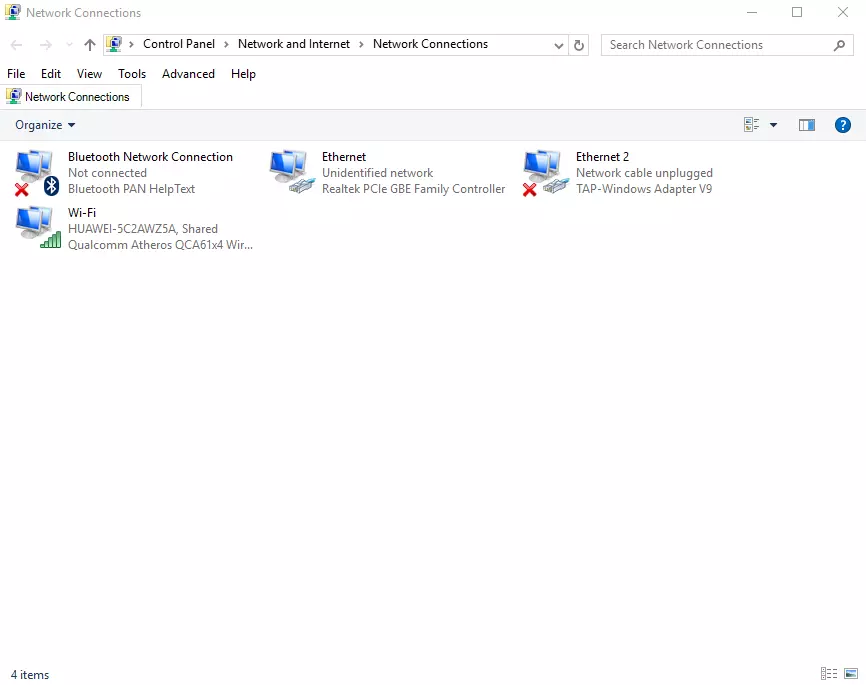
PcDuino8 Uno – Networking

Background
If you havent already, checkout the previous Post which covers the Serial Debug Port on the PcDuino8 Uno.
Most of the time you will want to use these devices in a connected capacity, If that means a connection to the world wide web, a local intranet connection or even just a direct connection to a PC or other device.
This bodes esspecially true for these small devices which slot into the embedded category of IOT (Internet of Things) which describes a collection of small interconnected devices talking to each other each programmed and equipped for a special purpose.
Hardware
We will need the following to get a basic device connection up and running.
- A PC, I will be using a Windows 10 machine that has wifi capabilities and a free ethernet port.
- A PcDuino8 Uno running Linaro Ubuntu
- A Serial Debug cable similar to the previous tutorial
- USB to Micro USB cable to power the PcDunio.
- And Finally an Ethernet Cable (Crossover shouldnt be required with modern hardware)
Setup 1 – Manual Static Connection
Edit Network Configuration Files on the Target
Firstly lets make a connection to our target through the Serial Debug cable we setup in the previous tutorial. Once connected lets make the following edits:
Open the first file (
vi /etc/resolv.conf
Change the contents to look like this:
nameserver 192.168.1.1
You can change the contents by hitting
Next lets make changes to
Open the file for edit
vi /etc/network/interfaces
Add this to the end of the file or to replace your own previous manual attempts
#The Primary Network Interface auto eth0 iface eth0 inet static address 192.168.1.200 network 192.168.1.0 netmask 255.255.255.0 gateway 192.168.1.1 dns-nameservers 192.168.1.1
The last thing to do is to create an override for the network manager to force it into manual mode
You can do this by issuing the following command:
vi /etc/init/network-manager.override
and adding the following to that file
manual
Save your changes
Next we need to make changes in windows to the ethernet adapter to set static values that will work with our new configuration on the target.
Prepare the PC for a Static Connection
Open the

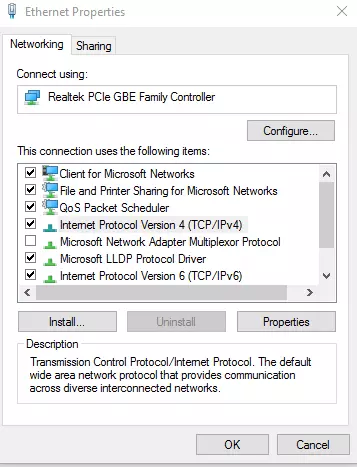
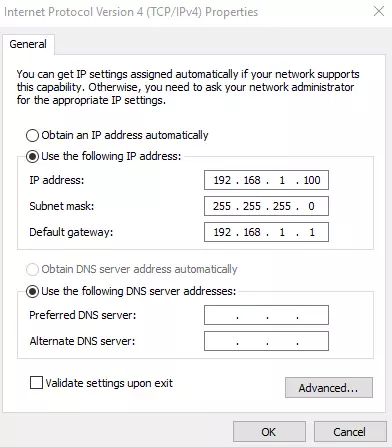
Right-Click on the Ethernet adapter that is connected to your device. Open Properties, and select

You will see the following:

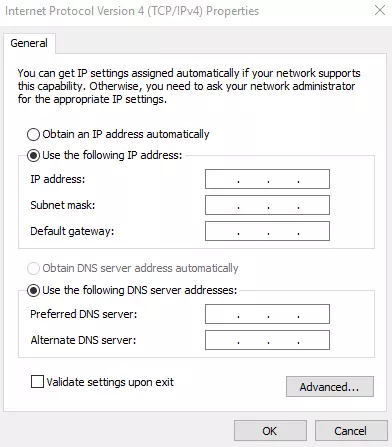
Here we will add the static IP and other settings:
IP address: 192.168.1.100Subnet Mask: 255.255.255.0Default Gateway: 192.168.1.1

Hit Ok to finalize the settings, You should Now Reboot your device to apply the changes we made earlier.
Once your device has restarted type the following into the terminal:
ifconfig
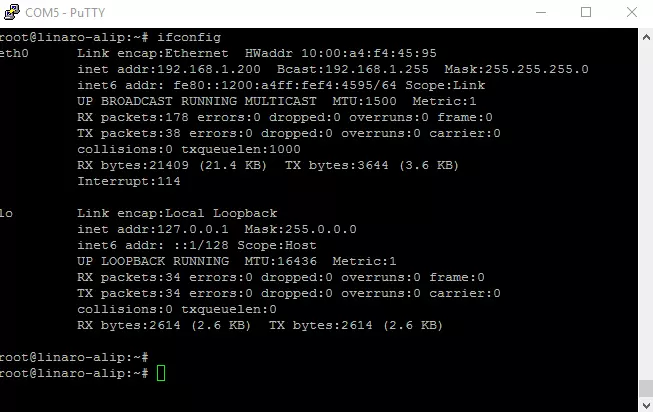
You should see the following:

As you can see the device has an Ethernet inet address of
SSH into the Device
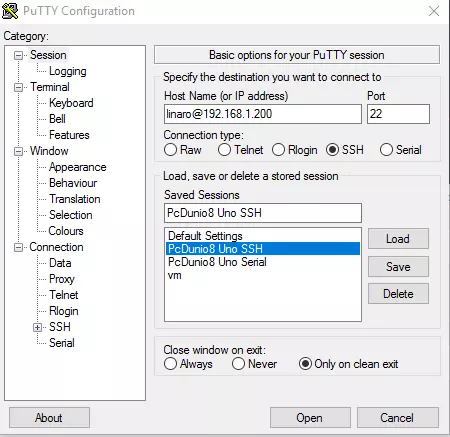
Using Putty we can SSH into the PcDuino8 Uno using our newly set Static IP Configuration.
Open Putty and select the SSH Radio button, Under host set it as the following
Open the connection and when prompted for a password use the word
Success, Your static configuration and connection to the target device works
Connect via VNC
Thankfully the VNC Daemon come preinstalled and is already running on the PcDuino Image I am running
All that you must now get is a VNC Client software for windows which you can download from here
I am using RealVNC as its easy to use and handle
Create a new connection in the software and provide the same IP address we used for connecting via SSH

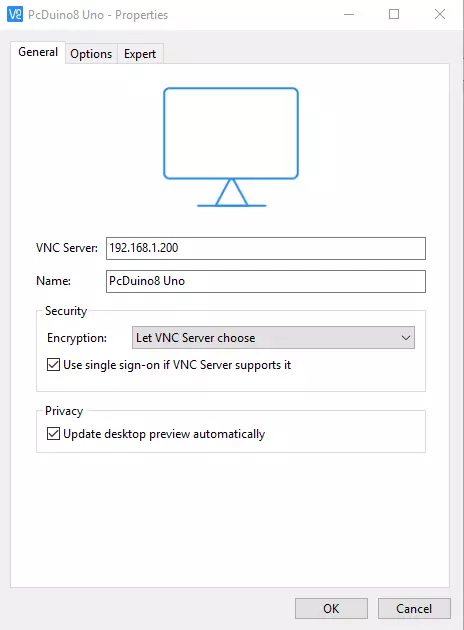
Double-Click on the connection to open it.
When prompted for a password use
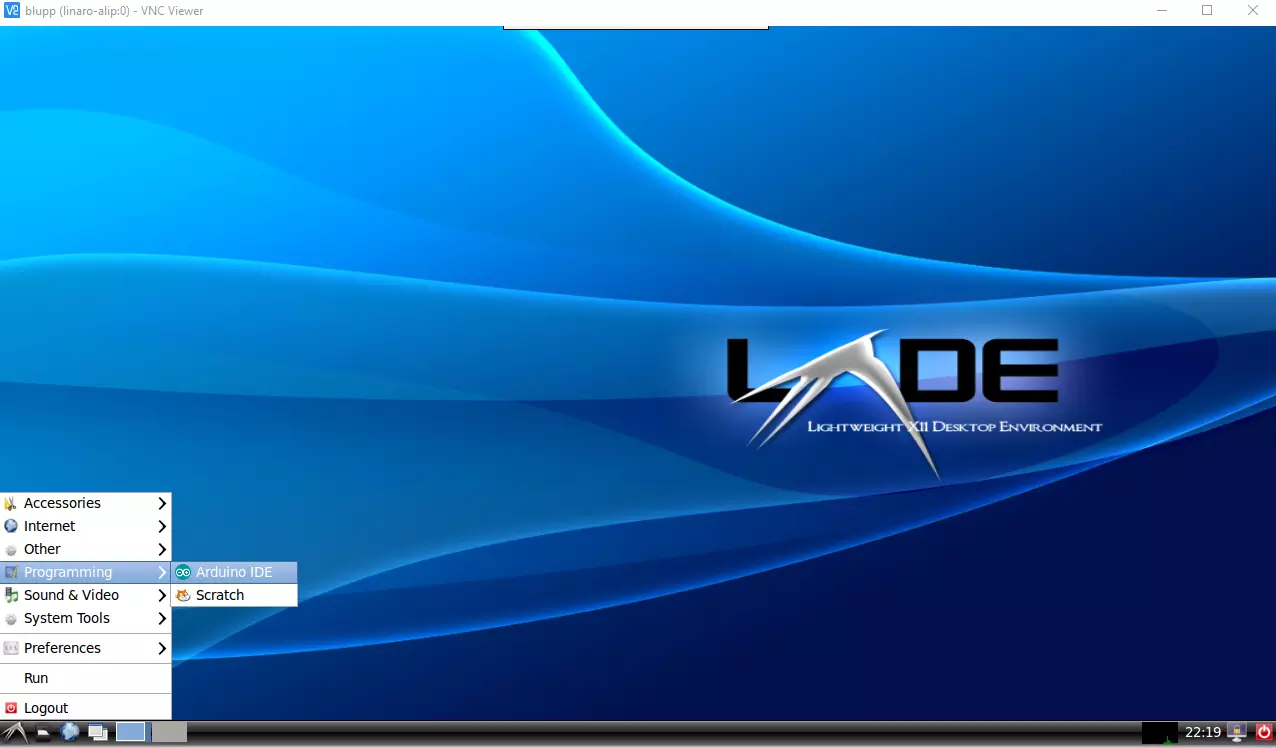
You should successfully load into your Linaro desktop environment remotely

Setup 2 – Automatic Dynamic Connection
Edit Network Configuration Files on the Target
If you followed the steps from
Firstly we need to remove the override file
rm /etc/init/network-manager.override
Then we must update
vi /etc/resolv.conf
Remove the nameserver we added earlier (
Finally we must update the interface file
vi /etc/network/interfaces
Remove all that we added earlier and replace it with:
auto eth0 iface eth0 inet dhcp
These settings will automatically grab the settings from windows when we share our PC’s internet connection.
Prepare the PC for sharing its WIFI Internet connection
In windows enter once again the
Right-Click on the Ethernet Adapter and once again select Properties and then select the Properties for
Set it to
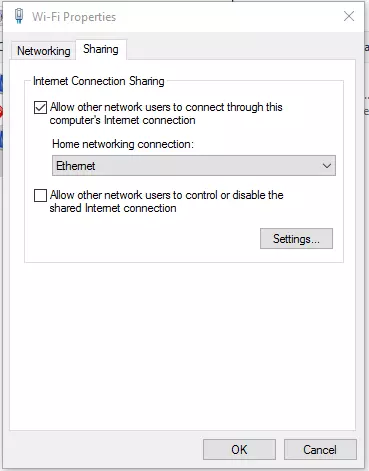
Return to the Network Connections Page and Right-Click on your WIFI Adapter (or whatever device is providing internet to your PC) and select properties.
Select the Sharing Tab and Share internet with the Ethernet Adapter

You should now reboot your pcDuino8 to apply the new network configuration.
Once the device has restarted run the following again to check its connection status
ifconfig

As you can see an Ethernet inet address has been automatically applied to the device
Test your new IP and Internet Connectivity
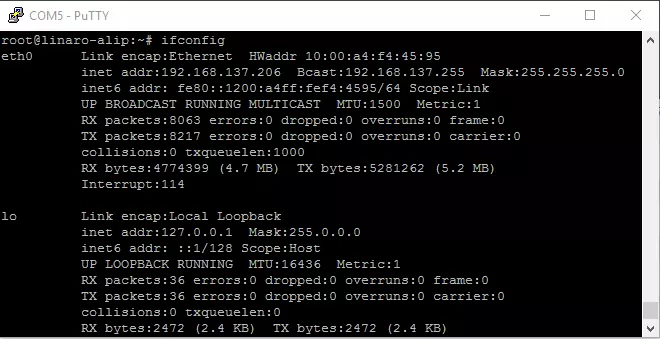
Try to SSH into the target using the ip address ifconfig returns for you, If it works then its a great success again but this only confirms a local connection
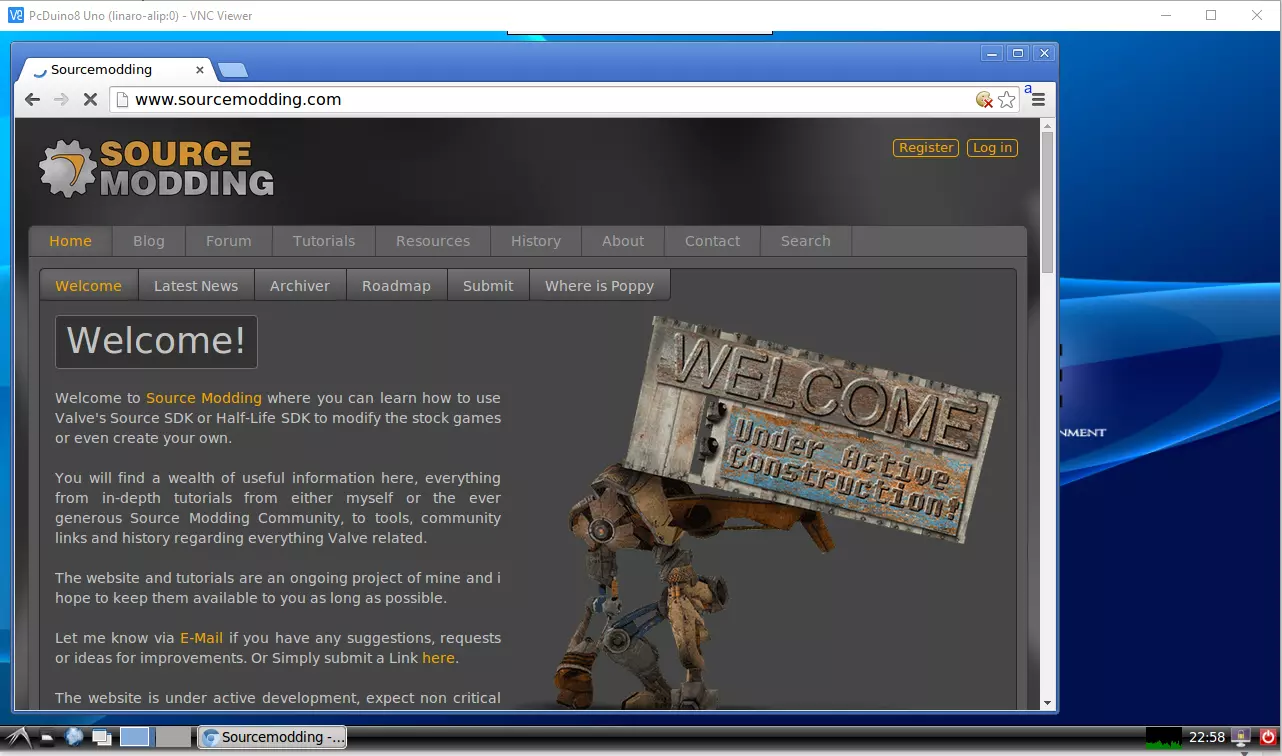
Open the VNC Client again and connect to your new IP, Once connected open a browser and try to navigate to a web page

Thats it folks, I hope this helps those who have been struggling with networking on their pcDuino8 Uno’s.
Feel free to comment below if you have any issues or questions
Also if you wanted to you could now install Nano the text editor via this command
apt-get install nano
Have Fun Tinkering!
References
Tags: internet of things, iot, Micro Controller, networking, pcduino, PcDuino8 Uno